Sabtu, 30 Juni 2012

4th of July on the Front Porch

FYI- forgive my use of Southernisms. I tried to make corrections where I could.
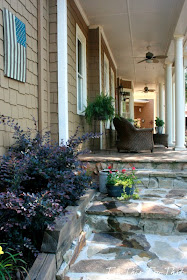
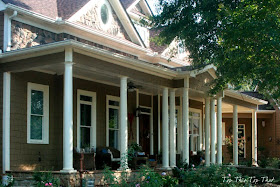
 There are two things every Southerner wants- A big pitcher  of sweet tea and a big ole front poach porch.
A poach porch to shoot the breeze on , eat our supper on and take naps on. You see, that's just what us Southerners do. In fact we caint figure out why people don't just live on their porch.
See, in my family, we like to entertain and more then
 likely it will be outside on the poach. We built this house for that very reason. So this year, I reckon the 4th is on the porch.
Most of our friends will walk on over from somewhere down yonder the road and find a seat to just sit... and sit, which is not really a problem cause every  Southern porch should have plenty of seats.
 With big comfy cushion and pillows-  but you wanna make sure they aint to comfy or they won't go home!
This is an example of the conversation you might hear on a Southern Porch
" Did ya'll hear about lil Johnny causing a ruckus down over at Stans place last evening"? or maybe this 
 "Yall young'ns stop a-carryin on so we cain't hear each other talk." 
Or when my neighbor asks  
"How'd all them dadburned "junebugs" git on your rose bushes?"
 And then there's the little extras that help us to celebrate Independence day, like these little pin wheels tucked inside a mason jar
or a stash of sparklers for the kids, although locals around this part prefer to set off dynamite as firecrackers instead
And goodness gracious, don't forget to serve the sweet tea. It's kinda like the law around here to drink your tea out of a chilled mason jar
 Although in a town of 500, chances are the one and only police officer ( aka- po-po) is sitting right next to you drinking his sweet tea too!
  Most important is to celebrate our country's independence and enjoy the day with your family and friends on wherever your front porch is!

 PS- for my Burlap summer wreath tutorial go here and for my Stars and Stripe pillow tutorial go here
Sharing the porch with :

Jumat, 29 Juni 2012

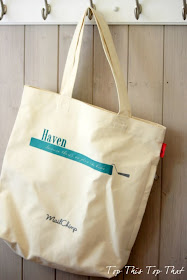
Happy Friday (Haven Recap)!

Unfortunately you won't see an album of photos that I took from the Haven Conference on my blog. Nope not any. The excitement and anxiety of attending the event got the best of me and I left the my camera at home.
I have  the after party shot- the slew of amazing memories and the knowledge that I took away.
 I want to say thanks to the girls in the "tribe" who were more fabulous in person then I could have imagined. I want to say thanks to the bloggers I did not  know prior to the event, but have since come to appreciate. And I want to say thanks to my family for giving me some time away, holding down the fort and watching the kids, just so I could do what I love to do- Blog!  If you are really disappointed that I did not bring my camera, you can go here for other Haven recap's and pics.
I am over at Stardust  today visiting with Olga and her readers  and talking about some of my favorite room makeovers. I would love for you to stop by.
PS- Getting the front porch ready for a 4th of July celebration!

Selasa, 26 Juni 2012

Guest Cottage Tour (on Dog House Lane)

Welcome to our Guest Cottage on Dog House Lane.
 Go down the dirt road 1/2 a mile, pass the old school house,take a left at the sign, and you're there
 Our guest cottage, is a place that was built for family and friends to come and stay a while, to relax
 
and enjoy beautiful country living
The cottage is special to us because my husband and I built it ourselves ( everything except the concrete slab) and lived in it while our own home was being built
 It is special because it's where our DIY skills were realized, and painted floors got their start- click here
 
Special because we got to design and build a kitchen
Click here for Kitchen renovation 
 Special because we learned how to tile and create a cottage style bath
Special because we learned how to create a bedroom for our guests to have a good nights sleep
And a space to sit and chat
 
Special for the little touches that make it warm and inviting for others
 
Special because it's got our heart and soul in it. It was a labor of love, that represents who we are and what we love to do. 
Down the road I will take you on the journey of this "first project of it's kind". First time framing, putting dry wall up, tiling a floor, installing plumbing, wiring, renovating a kitchen, painting a floor, you name it- this was a first!!  
We hope you will come for a visit one day!

For More of My Home Tour click here


     Want Top This Top That delivered directly to your inbox?
It’s easy!  Just enter your e-mail address.

Enter your email address:


Delivered by FeedBurner


Senin, 25 Juni 2012

The Best Banana Pudding Cheesecake (Ever)!

Banana Pudding Cheesecake? 
  Really?
That sounds kinda....
Well alright, I'll have a piece
Oh My- That's Delish.Can I have another! 
Click here for the Southern Living recipe for Best Banana Pudding Cheesecake you will ever have.
Have a great week!


PS- In case you need a Springform Pan to make your Banana Pudding Cheesecake, I found one here Cuisinart Chef's Classic Springform Cake Pan - 9" - Cuisinart Chef's C


Jumat, 22 Juni 2012

The Easiest Summer Burlap Wreath

Remember when my Rock Star Burlap Wreath went on a Springtime Tour?
You know, the Rock Star Wreath that may have more twitter followers then
 Lady Gaga
Maybe more facebook friends then Mark Zuckerberg
and I am thinking more stage props and dancers then Celine Dion in her Las Vegas shows?
Well, my rock star is going on a summer tour with a little help with the folks at Plaid and some mod podge products.
 
To get me started with an appropriate costume change, I received these amazing new Mod Podge products from Plaid.
 With all this amazing stuff, creating the new look was easy.
In the spirit of summer I decided to add some stars in traditional summer fabrics - red bandanna and cream color burlap, and mossy butterflies. 
For my stars, I created a star to use as a template and traced it on to the fabrics.
I used my Mod Podge scissors to cut and this little tool to spread out any creases on my fabric once I applied to the top of the Mod Podge solution.
I applied the mod podge solution to the stars, put the fabric on top and applied a second coat of Mod Podge. Applying the solution was so easy because I used the applicator that you screw on to the top of your mod modge bottle. The applicator was also very easy to clean up after use.
 When the the stars were dry, I used the 3D  Adhesive Mounts to stack and secure the stars into position on the wreath
Once the stars were completed, I wanted them to have their own "dancer" and created a mossy butterfly.
I applied the Mod Podge clear acyrlic sealer over the butterfly to help restore the look.
The stars also got a coat of sealer.
Awesome show , ugh?
And for an encore....
Eat your heart out J Lo, but I think my dancers are hotter!

To get a ticket for this show, click here for the wreath tutorial, here for the butterfly tutorial and head to Michaels for the latest Mod Podge products that I used. 
And for more amazing ideas using Mod Podge visit
Plaid on Pinterest, on Facebook and Twitter

 I wrote this post as part of a paid campaign with Plaid Crafts and Blueprint Social. The opinions in this post are  just my own.

Sharing over at:
52 Mantels 

Tip Junkie handmade projects

Kamis, 21 Juni 2012

Ready 4 Summer - Home Decor

Just because I am not hitting the shore this summer, doesn't mean that I can't be reminded of my families favorite pastime in our home.
And just imagine, if the family changed our minds,  I would have my  directional sign that I made out of salvaged wood, stenciled letters and leftover Grey paint, to help lead the way
And I thought that if  I needed help marking the shallow ends of the water, my orange wooden antique water buoys could help
Then there is this old wooden paddle that I can use,with repurposed decorative balls that I painted in beachy colors and sprinkled with sand, to paddle my way out to ride the biggest, most awesome waves
 
And I can even use this candle to see if it is dark before I get back to the shore

But then reality sets in and I realize.....


 that the arrow on my sign points to the backyard and not to the beach!
Click here for a tutorial on how I made the coastal candle holder.