Sabtu, 31 Maret 2012

Easter Hostess Gift


I will admit, I love those stinkin cake pops! But, I am not going to bore you again on how to make them, I  already did that here. I am though, going to show you how to present them in the cutest and easiest way as a hostess gift for Easter Sunday.
 
 For supplies you will need:
  • Flower pot
  • green crinkle paper
  •  Styrofoam
  • Wilton Cupcake liner in Yellow Flower design
  • Glue Gun
  • Cake pops with no sticks
 
Cut a piece of Styrofoam and place in your flower pot. Once secure begin gluing the yellow cupcake liners to the top. I used 4 liners for my medium size flower pot.
Once the liners are all dry, fill in the gaps ( so you don't see your Styrofoam) with the green crinkle paper.
Trim away any excess paper so that it looks neat. Take your pops and place two in each flower.
This is a sweet gift your hostess is sure to love!

Rabu, 28 Maret 2012

Will you sit with me now?

Here, you can sit in this chair
No?  How about if I sand her down and remove any loose paint? Then I will apply two coats of paint in a fun, bright coral color.
 Is she good enough now?
I know, I can go ahead and stencil the chair with my initial. I will use my projector and trace a "J" on a piece of cardboard and cut out with a knife.  Next I will apply the template to the chair and paint it a creamy white color.
Do you think she looks pretty since I added a decorative border under the initial, using the same process ?
Okay Sassy, If that's not good enough for you, I can throw on a few  pillows that I purchased recently. The Bunny pillow is from Dear Lille, and The Owl came from Home Goods.
and I will also add some beautiful flowers that my husband brought home in my monogram vase wrap
 Will you sit with me now?
 
  I thought so.
Sharing a seat with:


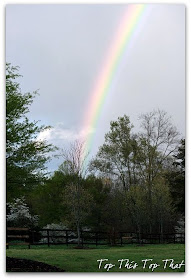
Somewhere Over the Rainbow There's a Winner

I did'nt find a pot of gold 
in this beautiful rainbow
but what I did find
 is a winner
 for a very sought after Bunny in a Burlap Wreath

Congrats to Sandra K comment #74
"I'm a new blog follower:) "

Sandra, please email me with your address and I will send your wreath out ASAP. 
Thanks to everyone of  you for entering the giveaway. My bunny feels loved!


PS-The above photos were taken on my property the other day after a passing shower. The size and colors of the rainbow almost made me feel like the rainbow was right there in the front yard and close enough to touch. Incredible to see.

Winner #74 selected by
Random numbers generated Mar 27 2012 at 18:57:47 by www.psychicscience.org  

Selasa, 27 Maret 2012

What I wish I knew then, about my Pottery Barn Pails

Okay, raise your hand, how many of you have made that over priced purchase and then months later realized "I could have made that"? Good, I am not alone.
 This is that purchase.
Although I love them, I realize I  probably could have made these pails that I purchased from Pottery Barn about a year ago myself,
but I didn't.
 I did however, save my girlfriend a few bucks with my version of the Pottery Barn pail that I made for her.
these cost a mere .99  for each pail, a can of spray paint
and the numbers 1,2,3 

now that's a beautiful thing! Click here for the tutorial.
Linking up here:

Minggu, 25 Maret 2012

Weekly Wows

Hope you are having a great weekend! With Easter two weeks away, these Wow's are sure to bring lots of ideas and spring some creativity!

Look how sweet these Easter Cones from The Crafting Chicks are! Maybe a great craft with the kids? I am actually doing this craft for my son's class this week.
How about these adorable lil Chick cupcakes from Hoosier Homemade

Look at this precious Spring Mantel from Nest of Posies
 I couldn't help but include this next Wow even though it doesn't exactly follow my Easter theme, but holy moly what a sewing room that Shop Ruby Jane has put together. I can assure you that my craft room does not look like this... well maybe in my dreams!
I hope that I have provided a bit of inspiration for your Easter projects, or maybe even your sewing room.
Have a great week!

Don't forget about my giveaway that I have going on here  for one of my Burlap Wreaths.

Sabtu, 24 Maret 2012

The Bunnies Are At The Door and A Giveway!

Hop on over
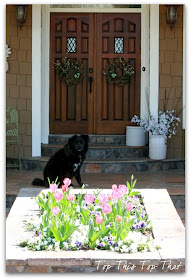
and when you get to my door you will see 
not one
 but two
mossy green little bunnies
that have found themselves a home in my burlap wreaths.
I made the burlap wreaths here, and the little bunnies, birds nest and flowers in the wreaths are from Pier One. 
 Before your get to my door  though
you will probably see my dog "Bear" who is protecting the bunnies
and my beautiful tulips, that I have waited for since I planted them last fall


And now for my giveaway
One of these wreaths could be going on YOUR door! 
Because of the overwhelming interest in the Burlap wreath, I would love to give away one of these wreaths to you.
There are three ways to enter this Giveaway
1) become a follower on Top This Top That blog and comment below that you already are or you became a new follower
OR
2) become a fan on my facebook page and comment below letting me know you are or you became a new fan
OR
3) follow me by email and comment below letting me know you are
Of course you could do all three options to increase your chances of winning ( an entry for each)!
Contest ends on Tuesday, March 27th at noon est, and the winner will be announced on Wednesday, March 28th. 
This giveaway is open to the contiguous US only.

Are these bunnies coming to your door?
PS- Bear doesn't bite

Rabu, 21 Maret 2012

How to Make a Spring Wrap

My inspiration for this Spring project came from my buddy, Karianne over at Thistlewood Farm. I adore everything about her, her blog and her style, but what really hooked me was her easy peasy burlap vase project.   Since falling for her wrap, I have started a "border line" obsession with a few wraps of my own.
I did this one for my mantel 
 I did this one for a gift
  I did this one for my Daffodils that you can read about here
The idea of something that looks pretty and is a cool way to conceal the flower stems that have been sitting in water a little to long, just works for me. 
To add to my collection, here are two that I made for Easter that I wanted to show you how to make.
 Vase #1
  Vase #2
  To make these wraps you will need:
  • glass vase
  • Choice of fabric for the wrap. For my larger vase ( vase #1)  I used cream colored muslin. For my smaller vase ( vase #2) I used cream color burlap
  • Velcro
  • fabric for the bunny ( or whatever image you use)
  • Fusible Web or liquid Stitch to secure your image to the wrap
  • burlap for the tail, eyes and ear
1) Measure the circumference of your vase and add about 1/2 inch to both sides. You will also need to determine how tall you want the wrap to be, add 1/2 inch to these sides as well.
2) Sew your finished edges.
3) Next, sew your Velcro strips on at the ends of your fabric wrap. After sewing the Velcro to one side, turn your piece over and sew it onto the opposite side on the other end. You want the two Velcro pieces to connect, so that it secures itself around your vase.
4) Next, add your bunny. I traced a bunny pattern onto my fabric and then cut the shape out.
5) I then used fusible web to secure my bunny to the wrap. After ironing on the fusible web to the bunny, I ironed  the bunny onto the wrap. You could also use liquid stitch to adhere the bunny to the wrap. Another option is to finish the edges of your bunny by sewing around the image once it is secure on the wrap.


6) For the eyes, ear and tail I used cream burlap. For the tail and eye , I made rosette flowers ( big and small) and secured with hot glue. For the ears, I simply twisted a small piece of the burlap and secured on with hot glue. 
 For my larger vase, I also added two strips of fabric around the top and bottom of the vase and secured with hot glue.
 Sweet ugh?


Perhaps you will start a collection of your own?


Sharing the wrap at 

Tip Junkie handmade projects